


Laser Engraving and 3D Printing: When to Combine Them and What You Can Create
A plain 3D printed part can be useful. A laser-engraved part can look polished. Put the two together, and suddenly you have a product that feels finished, personal, and ready to sell.
That is the sweet spot.
3D printing builds the shape. Laser engraving adds the detail. One gives you form, the other gives you finish. For startups, side hustles, makers, and anyone testing product ideas, this can be a very practical pairing because you can create small batches without ordering molds, plates, or large inventory.
The trick is knowing when to combine them and when to let each machine do its own job. Use both at the right time, and you can make items that look custom without wasting hours. Use both when you do not need to, and you can add cost, complexity, and a few headaches you did not ask for.

How laser engraving and 3D printing work together
3D printing is an additive process. It builds an object layer by layer from a digital file. With common desktop printers, that usually means melting filament like PLA, PETG, ABS, or TPU and placing it exactly where the design tells it to go.
Laser engraving is a subtractive or marking process. A focused beam of light removes, burns, melts, or changes the surface of a material. On wood, it darkens and cuts into the surface. On coated metals, it can remove the coating. On some plastics, it can mark or lightly texture the surface.
When you combine them, the usual workflow looks like this:
Design the part in CAD or 3D modeling software.
3D print the object, jig, fixture, or prototype.
Clean up the print if needed.
Place it in the laser engraver.
Engrave names, numbers, patterns, instructions, logos, serial marks, or artwork.
The magic happens because each machine handles a different part of the job.
The 3D printer builds the object. It can create shapes that would be hard to cut from flat material, including curves, clips, cases, mounts, organizers, figures, and prototypes.
The laser engraver adds surface detail. It can create sharp text, fine lines, patterns, and repeatable markings faster than trying to print every tiny detail in raised plastic.
That pairing is especially useful for products that need both function and personalization. Think printed tool organizers with engraved labels, custom game pieces with engraved markings, product prototypes with part numbers, or display stands with personalized names.
For a startup, that means you can test a product idea without committing to mass production. Make five versions, show them to customers, adjust the design, and make five more. That kind of flexibility is worth a lot when you are still figuring out what people actually want.
What you can create when you combine both tools
Laser Engraving and 3D Printing works best when the final product needs shape, detail, and a finished look. The result does not have to be fancy. It just needs to solve a problem or feel more personal than something pulled from a bin.
Here are some practical ideas.
Personalized keychains and tags Print the shape, then engrave names, QR codes, pet names, room numbers, or small artwork.
Custom tool organizers Print holders, trays, or wall mounts, then engrave labels so every tool has a clear home.
Product prototypes Print the prototype body, then engrave part numbers, control labels, instructions, or test version codes.
Event items and small gifts Print ornaments, tokens, keepsakes, or display pieces, then engrave names and dates.
Board game pieces and accessories Print tokens, trays, card holders, and terrain pieces, then engrave symbols, numbers, or texture details.
Small business packaging helpers Print stamps, fixtures, guides, template holders, and display stands. Engrave labels or repeatable placement marks.
Educational models Print models of parts, maps, molecules, gears, or classroom tools, then engrave labels directly onto the surface or onto attached plates.
One of my favorite uses is making custom jigs. A jig is a helper tool that holds something in the right place. You can 3D print a jig that fits a product perfectly, then use the laser to engrave the same spot every time. That is huge for repeat work.
For example, say you sell small wooden bottle openers. You can print a tray that holds each opener in the exact same position inside the laser. Drop the opener in, engrave, remove it, repeat. Less measuring. Less guessing. Less “why is this one crooked?” energy.
That is where combining both tools can turn from fun maker stuff into a real production helper.

When it is best to combine laser engraving and 3D printing
Use both tools when the finished piece benefits from the strengths of each machine. That sounds simple, but it is the decision that saves time.
A good combined project usually has at least one of these needs.
The part needs custom text or artwork
3D printers can print raised or recessed text, but small letters often lose detail, especially on curved surfaces or lower-resolution settings. Laser engraving can create cleaner, sharper text on the right material.
This is useful for:
Nameplates
Serial numbers
Control labels
Measurement marks
QR codes
Custom messages
If the text changes from order to order, engraving is usually easier than making a new 3D model every time.
The shape is complex but the detail is flat
A 3D printer is great for form. A laser is great for surface detail. If the object has a complicated shape but needs flat labels or decoration, combine them.
A printed enclosure for an electronics project is a good example. Print the case, then engrave button labels or port names. You can also engrave a separate thin plate made from wood, acrylic, or coated metal and attach it to the printed case.
You need repeatable small-batch production
Small businesses often live in the awkward zone between “one handmade item” and “thousands from a factory.” That is where these tools shine.
If you need to make 10, 25, or 100 similar items with light customization, a 3D printer and laser engraver can help you build a repeatable system.
A simple production flow might look like this:
Step | Tool | Purpose |
Print the base item | 3D printer | Creates the shape or holder |
Print the jig | 3D printer | Holds each item in place |
Engrave details | Laser engraver | Adds names, labels, or graphics |
Inspect and package | Hand finishing | Checks quality before delivery |
This setup is great for testing demand. You can sell a few batches, learn what customers ask for, and improve before investing in bigger equipment.
The final piece needs a more polished finish
A raw 3D print can look like a prototype, especially if the layer lines are visible. Laser-engraved wood, leather, coated metal, or acrylic accents can make the same object feel more complete.
For example, a 3D printed trophy base with an engraved wooden plate looks more finished than a fully printed trophy with rough text. A printed display stand with an engraved acrylic front can feel more professional without a complicated build.
Small details matter when people are deciding whether something feels worth buying.

When it is better to use them separately
Combining tools is powerful, but not every project needs both. Sometimes using one machine is faster, cleaner, and cheaper.
Use 3D printing by itself when the shape is the main point
If the product is mostly about structure, fit, or function, 3D printing may be enough.
Good examples include:
Brackets
Replacement parts
Clips
Spacers
Prototypes
Mounts
Storage trays
Flexible parts made with TPU
If the part does not need decoration, labels, or personalization, adding laser engraving can slow things down. You can always add printed text directly to the model if the letters are large enough.
3D printing alone is also better when the material does not engrave safely or cleanly.
This part matters: do not laser engrave unknown plastics. Some plastics can release harmful fumes. PVC is a clear no because it can release chlorine gas and damage the machine. If you are not sure what the material is, do not put it under the laser.
Use laser engraving by itself when the product is flat or already made
Laser engraving shines with flat goods. If you are personalizing wood signs, tumblers with the proper rotary setup, leather patches, acrylic ornaments, coated metal cards, or cutting boards, you may not need 3D printing at all.
The laser can also cut certain flat materials, depending on the machine type and power. That means you can make signs, ornaments, boxes, templates, and decorative panels from sheet goods without printing anything.
Use the laser alone when:
The item is already manufactured.
The product is mostly flat.
You only need text, artwork, or a cut pattern.
Printing would add weight, time, or unnecessary plastic.
The natural material is part of the appeal.
For example, if someone orders a custom engraved wooden sign, 3D printing probably adds nothing. Let the laser do the job.
Keep them separate when speed matters
Both machines take time. 3D prints can run for hours. Laser jobs are often quicker, but setup still matters. If combining both tools doubles your handling time without improving the final product, skip the extra step.
For business work, always ask:
Will this make the product better?
Will the customer notice the difference?
Can I charge enough to cover the extra time?
Does it reduce mistakes or create more chances for mistakes?
That last question is a big one. Every extra setup step is another place for misalignment, wrong settings, or a forgotten file.
Materials and setup choices that make the workflow easier
Material choice can make or break the combo.
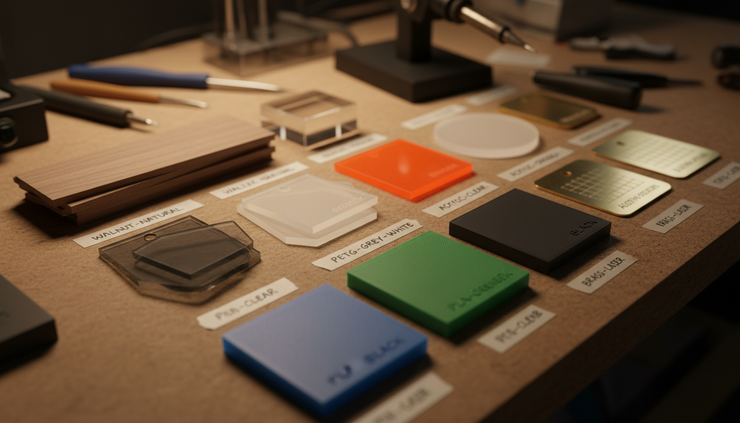
PLA is common for 3D printing because it is easy to use, but it does not always engrave in a clean, high-contrast way. PETG can be durable, but it can also be stringy when printed and may not mark nicely. Dark plastics sometimes show engraving better than light ones, but results vary.
For many projects, the better move is to print the structure and engrave an attached accent material.
That could mean:
A printed base with an engraved wooden plate
A printed case with an engraved acrylic insert
A printed award with an engraved metal-look tag
A printed organizer with engraved labels glued or snapped in place
This gives you more control. The printer handles the shape. The laser engraves a material that is known to work well.
A few setup tips help too.
Design flat engraving areas into the print.
If you know a part will be engraved later, create a flat panel or recessed space for that marking. Lasers prefer consistent focus distance.
Use jigs for repeat jobs.
A printed jig can save time and improve placement. This is one of the best beginner business uses for a 3D printer, even if the finished product is not printed.
Test on scraps.
Never start with the customer’s final item if you can avoid it. Test power, speed, and placement first.
Plan for finishing.
Sanding, painting, gluing, or clear coating may affect engraving. Decide the order before you start. Sometimes engraving before assembly is cleaner. Other times, assembly first helps you line things up.
Ventilation is not optional.
Engraving creates smoke and fumes. Use proper ventilation, filtration, and safe materials. Read your machine’s manual and keep a fire watch. A laser is not a slow toaster you can walk away from.
A simple way to decide which tool to use
When a new idea pops into your head, run it through this quick decision path.
If the project needs | Best choice |
A custom shape, bracket, holder, or fitted part | 3D printing |
Text, artwork, or decoration on a flat surface | Laser engraving |
A complex shape with personalized details | Combine both |
Small-batch products with repeatable placement | Combine both, especially with a printed jig |
Fast engraving on existing items | Laser engraving |
Functional prototypes with no surface detail | 3D printing |
A premium finish using wood, acrylic, or coated metal accents | Combine both |
For startups, the smartest place to begin is usually not with the most complicated product. Start with something simple that teaches the workflow.
A good starter project might be a 3D printed phone stand with an engraved wooden nameplate. It has a useful shape, a clear engraved detail, and enough room for customization. From there, you can test different colors, materials, and price points.
Another smart starter project is a jig. Even if you sell only engraved products, a 3D printer can help you make better fixtures, spacers, holders, and alignment tools. That improves repeatability, which is a fancy way of saying fewer ruined items and less muttering under your breath.
The best combination is the one that makes the product better or makes your process easier. If both tools earn their place, use them together. If one tool can do the job well on its own, keep it simple and move on.
For anyone learning this business, that mindset matters. You do not need to make every item complicated to make it valuable. Build the shape when the shape matters. Engrave the detail when the detail matters. Combine them when the finished piece becomes stronger, cleaner, more personal, or easier to produce.
That is how these two machines go from cool gadgets to real production tools. And honestly, that is where the fun starts.


Comments